
Disclaimer: These interviews are not associated with A-M-V.org or its administration. The Lip Flapper does not summon succubi into this world for the purpose of kicking ass. We do, however, know that Bustin' makes us feel good.
_________
Description
Welcome to the Lip Flapper! Each week, we delve deep into the community and get a look into both individual members as well as group discussions on various issues that surround our hobby.
________
This Week in "The Lip Flapper"
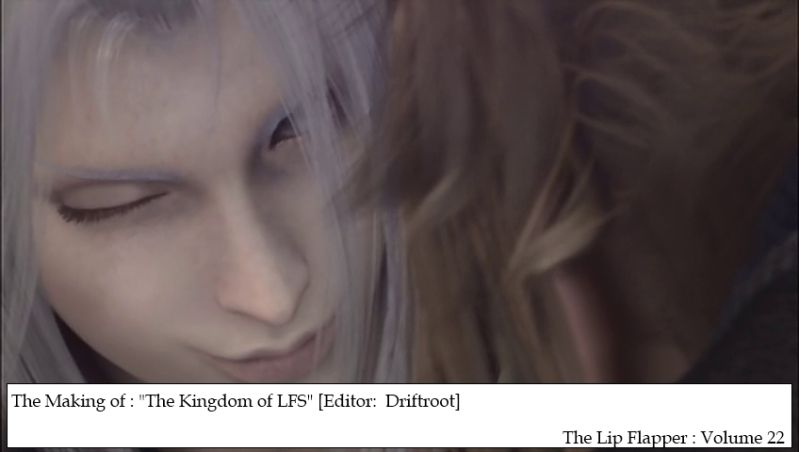
The Lip Flapper journeys into the world of Driftroot's mind, as we learn techniques used in the creation of "The Kingdom of LFS".
________
Interview Spotlight
The Kingdom of LFS received wide praise in its AMV announcement, being heralded as a great work with excellent effects and solid editing. As such, I thought it to be an important thing for Driftroot to share knowledge with us all in how the video was created!
________
The Interview
(Interview Note: For the record, Driftroot made all the figures made in this discussion, and I am so thrilled that she took so much effort into this interview. Please make sure and give her a big round of applause for me.
Q: Thanks for joining me today DriftRoot! We’re gonna talk about The Kingdom of L.F.S. and how exactly you did a lot of the things you did with it. But before we get to the nitty-gritty, how about you explain you came about deciding to edit this combination and why you wanted to do so many different visual effects?
*Leans forward and taps microphone*
Is this on – yes. Yes? Ok, well…thanks for having me on, Code! You were curious about L.F.S. when it came out, and I’m glad to get this opportunity to answer some of your questions and avoid that “Making of” video you wanted me to create! Before we go too far, I’d like to mention that I’m a graphic designer who uses Photoshop on a daily basis, so a lot of these effects aren’t something I just whipped out without having logged a lot of hours in the driver’s seat, as it were. I only work with video as part of my AMV hobby, however, so it’s highly likely that some of the methods I use in After Effects and Premiere aren’t the only or even best way to go about things (L.F.S. represents the first time I’ve actually ever heavily used AE in a video). I also should forewarn the viewers at home: explaining “how” I did things also involves explaining WHY. Anyone who wants hard technical details about something is welcome to ask - I’m happy to answer questions like that more in-depth.
So! How did I wind up combining Advent Children with the Knights of Badassdom trailer? Hmm… I guess I should start with another brief disclaimer: I’ve made a number of Advent Children AMVs, and up until now the reason has always been that I get great joy out of tormenting Cloud & Co. This latest AMV wasn’t an exercise in quenching my thirst for Advent Children blood, though, Advent Children just happened to be the tool I decided was best suited to parodying the Knights of Badassdom trailer.
I first saw the trailer back in August 2011 and, after watching it a dozen times or so, became totally convinced that it could make a really fun AMV. At first I zeroed in on pairing it up with Angel Beats, which seemed to share similarities with the trailer’s story line and comedic moments, but as I scrubbed through a few episodes, that series just didn’t seem up to the task. The trailer has this outrageous, tongue-in-cheek vibe to it that I really wanted to duplicate, and Angel Beats was playing it too straight. So, with only a little hesitation, I reached for my backup plan: Advent Children – no one was ever going to think for one moment my AMV was playing it straight if I used that, right?
The hesitation occurred because I knew that there were some major challenges ahead. Trailers have a lot of dialogue, which meant lip syncing, and there’s a reason you don’t see Advent Children lip synced very often. Then there’s the glaring lack of some important things featured in the trailer, like a succubus, a map, people getting eviscerated, sexual innuendo, enthusiastic crowds of LARPers, etc. I was going to have to eliminate or put a new spin on some of these things, which risked undermining the very “vibe” I wanted to capture. Worst of all was the very basic fact that the trailer’s characters and settings needed to consistently and logically match up with those in Advent Children. So, I didn’t know if all of these things were going to fall into place, and I knew it was going to require some special effects work to pull off, but I figured it was worth a shot and I’d deal with those situations as they arose.
And that is the answer to the second part of your question about the variety of effects in this AMV: the effects were a means to an end, not an end in and of themselves. Yes, there were a number of effects used in this AMV, but each and every one came about as a solution to a problem I encountered, not because I was sitting back, wondering what else to throw in or experiment with. I could have thrown in a lot more, but that wasn’t the point. (There is, in this video, precisely one effect that does not support my agenda of making a Knights of Badassdom/Advent Children trailer.) If I could have made this AMV to my satisfaction without all that effects work, believe me, I’d have done so! In fact, going into this project, I severely underestimated how much time and effort was going to be involved - about 230 hours, roughly 150 hours solely for special effects. At around 60 hours of effects work, I was foolishly saying I was “almost” done, so even in the middle of the whole process, I wasn’t paying much attention to how all of these effects were piling up.
Q: One of the most obvious visual effects in this AMV was lip syncing to almost perfect detail. Care to give the viewers at home a little insight into how you made such spot-on sync?
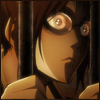
I think the key to lip syncing Advent Children is understanding that it’s not just about lip flap. Advent Children looks so real that any little thing being “off” can throw the whole thing “off.” It’s not just a mouth that’s got to move the right way when you’re trying to lip sync, it’s a whole face that has to have the right expression, a character with the correct body language, a jaw moving, lighting, perspective, color, hair out of the way (you can’t lip sync through hair very easily)… all sorts of horrible things must fall into place to be believable, and all sorts of obstacles can get in the way of trying to fix what’s not believable. At one point I complained that Sephiroth’s eyebrows were syncing better than his mouth, and this is so true that’s it’s not even really funny.
As to how it came out looking so spot-on…I decided very early on that I would only lip sync a scene if it could be done well, and this actually heavily influenced how the AMV came together, particularly in the first half where there’s a lot of dialogue and I had to establish the characters and place settings. The natural accuracy of the lip flap was really the last thing I worried about, though, when I was setting up these scenes. All else being a good fit, if a character was talking when they should be talking and there was a reasonable chance I could go in and alter the lip flap, then that was good enough to make that scene stick. Several times there were alternative scenes choices available with absolutely perfect, natural lip sync, but they didn’t fit into the AMV as well as another scene, so they didn’t make the cut. When you eliminate all the bad stuff and leave in only the good stuff, your chances of success go way up. ^_^
The lip sync in this AMV is a combination of both arranged and manual sync - some scenes are a la natural and some are not. Sometimes the natural sync in L.F.S. came out better than my lip sync, but sometimes it didn’t, so I figure it all comes out even in the end.
The manual lip sync in this AMV was all done in After Effects, and in every case involved replacing a good portion of someone’s lower face with different footage. It was not the most difficult effect I had to do with this AMV, just tedious and frustrating at times because – unlike traditional anime – there is no “perfect” mouth motion that you just need to be able to zero in on. A CG mouth is not created with a few dark lines which you can move or redraw any way you want, it’s hundreds of pixels all working together in a tapestry of motion to affect speech. If even a dozen pixels are moving the wrong way, you can see it, and those pixels may be way down at the bottom of the chin or under the cheekbones, not right at the mouth, so you have to take those areas into consideration as well when you try to alter the lip flap (or, should I say, face flap?).
My methodology was similar to what many people do with lip sync: find a point where the character’s mouth is in the appropriate position, then go in and build convincingly off that point. The replacement footage was usually obtained from just a few frames away in the same scene, but as to HOW the lip sync was achieved, it really varied. Often it was a few different, very short clips strung together, sometimes sped up or slowed down, transitioning into one another via opacity changes, not hard cuts. In only a couple of cases was I able to simply plop down another lengthy clip to replace the original lip flap, but even that had challenges, particularly when it came to keeping the new mouth in the right position on the face. Again, with traditional anime, it’s pretty simple to figure out where a mouth should be and keep it on target. With Advent Children, things are always moving, whether it’s the camera itself or the character turning their head, or both. One time I even had to rely on a grid pattern of guides to make sure everything was lining up properly (Fig. 1).
Another technique I used (more on this later) was the liquefy effect, which lets you bloat or pucker footage in a specific area, among other things. This is a pretty obvious effect, if you know what it looks like, so I used it only twice and very subtlety because I felt the situation demanded it. You can see the lip sync liquefy effect most clearly when President Shinra is chewing Kadaj out (“You summoned a succubus from hell!?”). The trailer dialogue places heavy emphasis on the word “summoned,” and even though Shinra’s mouth was syncing up with the sentence, it wasn’t opening very wide – he’s almost muttering to himself. To make it look more realistic, like Shinra was emphasizing this word, I liquefied/bloated his mouth to make it open a bit more (Fig. 2). It doesn’t look totally natural if you watch closely, but it goes by very quickly and the important thing is that the overall expressiveness of motion matches the dialogue. As a static image, the liquefaction is almost unnoticeable - you can only see it when the video is playing.
Q: My favorite effect in the whole AMV was the beautiful color of Tifa’s red eyes. I’ve personally tried color-correcting before, but how’d you manage to get such a lovely shade to look both creepy and natural to her character?
Ah, well, people often think of color correction solely as changing the properties of the original footage via methods like level/curve, saturation or hue adjustments. That’s not how Tifa’s eyes were done. In her case, the “color correction” wasn’t correction as much as color combination, since she’s basically wearing red contact lenses. I applied these contact lenses in a realistic manner using a variety of compositing techniques and blending modes.
Blending modes are a very powerful tool and useful for many things, particularly color correction. Photoshop and After Effects both offer blending modes for layers, and more recent versions of Premiere, as well. These modes come in different flavors, but can essentially be understood as five basic types: Normal modes, Darken modes, Lighten modes, Contrast modes, Inversion modes and Composite/HSL modes. This website has a good overview of blending modes, and this 12-minute video tutorial does a good job of showing them at work. Understanding the exact nature of each individual blending mode so that you can predict the results of using them isn’t really as important as just getting a feel for them, trying different combinations and seeing what gives you the best results.
Back to the eyes!
There are four main scenes in this AMV where Tifa’s eyes are colored (Fig. 1): one was “animated” in Photoshop (C), three in After Effects. All of Tifa’s contact lenses started out in Photoshop, however, where they were made and experimented with until I got them sized and blending the way I wanted. It wasn’t enough to just stick red contact lenses on her, though. I cat-slit her irises and add some more yellow and orange into the mix, as you would see naturally (err, I guess…I haven’t ever actually met a succubus, so this is all conjecture, on my part). This extra work doesn’t always come across as an obvious effect, but it adds a certain extra depth and realism to it all and gives me warm fuzzies.
The color correction aspect of this is largely a result of the Soft Light mode, which combines red in a subtle manner with Tifa’s natural brown eyes. Sometimes I added another layer of contact lenses in Overlay mode to make things more dramatic. I also varied the opacities of these layers as necessary to achieve the results I wanted, and sometimes added extra layer styles like an inner glow or shadow. If a scene went by really fast, I also added extra color to make sure Tifa’s red eyes were noticeable. Every set of contact lenses was actually handled differently because Tifa’s are lit and colored with a lot of variation in the original footage – in one scene her eyes are light gray, in another a very dark, almost black/brown, so there wasn’t a one-size-fits-all solution.
It wasn’t enough just to add red to Tifa’s eyes, though. On top of the contact lenses I had to add highlights, because eyes are like picture frames: the picture (the color of the eyes) isn’t what reflects the light, it’s the glass covering the picture (the surface of the eyes). When you stick red contact lenses onto Tifa, those highlights turn pink, so you have to go back in and restore them, in this case by adding bits of gray or white where necessary. This situation with the highlights was a big reason one scene was done entirely in Photoshop (the last one in the AMV, where Tifa is turning around to look at Vincent). First of all, her eyes are pretty small in that scene, and coloring them was a pixel-by-pixel task that I didn’t want to bother with in After Effects. Secondly, there are a lot of irregularly moving, changing highlights in her eyes during this scene, and again, it would have been inefficient and challenging to deal with those in AE.
After Effects is where most of the contact lenses were masked and animated to track with the motion of Tifa’s eyes. The color correction also was fine tuned in AE and combined with other effects, such as shadows under Tifa’s eyelashes when her eyes opened and closed (Figs. 2-4).
The scene in which you first see Tifa, where her eyes are left glowing in darkness (Fig. 5), was the most complicated. While the main compositing was done in After Effects, the lighting and “glow” were accomplished in Premiere with a different set of contact lenses, and everything had to play off everything else perfectly to achieve the end result. One of my beta testers (Emong) prodded me to keep tinkering around until it looked like it was supposed to, which is a good thing, because I was fed up with trying to achieve this effect and might have let it slide or removed it altogether if he hadn’t said something. So, anyone who beta tests, there’s some good advice: if you see something that looks ok, but you think could be done better, don’t be afraid to speak up!
Q: So the little map at :29, how’d you come to change it up so effectively and make it look like a natural part of the scene?
This was the most complicated scene in the entire video to create in terms of how many steps were involved. As usual, it started out in Photoshop and was finished up in After Effects. The map itself is one you can find pretty easily by Googling “FF7 world map,” and while it isn’t all that high quality an image, it was fortunately good enough for what I wanted to do with it.
First the map’s original yellow/blue color was toned down and tweaked with a Vibrance adjustment layer and a gradient overlay (Fig. 1), then it was brought in over a still frame I’d pulled from the scene in question so that I could properly orient the map on the wall. The perspective orientation was done using Photoshop’s Vanishing Point filter (Fig. 2), which is a handy tool that allows you to easily lay out different planes, then apply artwork to those planes such that they match the perspective of what’s around them. It doesn’t always work perfectly, but IMO it’s often better to try this filter first rather than transform and distort your artwork by hand. The new artwork was not cropped at this point to fit within the picture frame - that was done later in After Effects. This scene has an internal upward pan in it, and I had to make sure that the map itself extended freely beyond the edges of the 848x480 video footage so that there was something to pan over (note the white canvas area in Fig. 2).
Once the map was on the wall, I added a second round of color correction and effects to help it blend in with the original artwork. There was a subtle dark to light cast to the wall, and I mimicked this coloration pattern as closely as I could by creating background gradient matte layers under the map (Fig. 3). I then lowered the map layer opacity to 50% so that the coloring of the matte layer underneath would come through. Other effects ranged from interior shadows where the edge of the picture frame was supposed to be, to extra noise so the new artwork didn’t look so crisp and clean in comparison to the video footage.
On top of the map I added the little Post-it notes (which were actually artwork I’d made a number of years ago – recycling at its finest). The drawings on the Post-Its were made in Illustrator, combined with the Post-Its in a Photoshop file, and then that file was brought into Photoshop to be applied to the map with the Vanishing Point filter. The Post-Its, of course, had to be color corrected to match the scene, again with a combination of matte background layers and layer styles and effects (Fig. 4).
Where’s the glass, you’re thinking, where are the reflections which should be on top of the map, but under the Post-Its? Like Tifa’s eyes, you know?! The reflections are in a different file, don’t worry, TWO different files, actually: one for the lighter reflections, one for the darker (Figs. 5-6).
The final work on the map scene, as I mentioned, was done in After Effects (Figs. 7-9), where the artwork was animated and President Shinra rotoscoped (which was the most challenging rotoscoping in this entire AMV - I never could get it as good as I wanted). The map, the glass reflections and the Post-Its were brought into After Effects as separate image layers. Why didn’t I just bring them all in as a combined image? Well, first of all, thanks to the panning I’d mentioned in this scene, the map/Post-its do not track on the wall at the same speed as the reflections, and the reflections are of course behind the Post-Its. This scene also involves a focal point transition, where what’s in the foreground (President Shinra) starts out in focus, and then he becomes blurred as the background comes INTO focus. I wanted to be able to control the blur levels of all these layers “live” in After Effects. Even when the map, Post-its and reflections come into focus in this scene, they all still have various levels of Lens Blur applied in After Effects. Despite the extra noise I’d added early on in Photoshop, the new artwork still needed this extra help to appear part of the natural environment.
This brings me to a very important point: if you can edit your files non-destructively and flexibly, DO SO. The effects in this AMV would have been a nightmare to accomplish without approaching everything from an efficient, non-destructive workflow. “Non-destructive” means doing everything possible to avoid permanent alterations such as drawing right on an artwork layer or applying an effect that can’t be undone or adjusted at any time.
In After Effects, non-destructiveness is really built into the way the program operates, but the other Adobe programs can be made to perform in very similar ways, most importantly through Photoshop’s Smart Objects, which are very much like AE layer comps. Smart Objects are basically layer-based containers for images within a Photoshop file. You can do all sorts of things to these Smart Objects, including apply filters and distorting them, without permanently altering the original image. It also means that, if you backtrack to the original image within a Smart Object and alter that image, everything else up the line also gets altered automatically. As an example, let’s say that I decided right now that I wanted to change the drawings on the Post-Its. All I would have to do is access that Photoshop Smart Object, change the image inside of it, and that change would immediately be reflected wherever this that Smart Object was used, all the way up the chain into my After Effects file. If that was not a Smart Object, I would have to recreate each and every instance of that Post-It by hand, hopefully remembering along the way how I wound up at the final version. No thank you!!
Non-destructive editing also involves using things like layer styles and adjustment layers whenever possible, rather than permanent effects and filters you can’t undo or alter once they’re applied. It also means never, ever deleting or erasing unwanted artwork in a file unless you have a darn good reason for doing so. Anything I didn’t want showing (anything I needed to “erase”) was concealed with a layer mask that could be edited at any time in a variety of ways to reveal more or less of the artwork. Sometimes these masked layers got pretty complex, but they also gave me outstanding control over everything and the ability to always go back and restore something that had been “erased.”
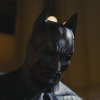
Q: Sephiroth’s wink at :37 was lovely. I’d love to know how you managed to control the left side of his face.
Ah, yes, that would be the liquefy effect again. Seems like every AMV I make, there is something dangling in front of me like a carrot that I really want to do, but have no idea how to do or how successful it will be. This was that scene in L.F.S. (People keeping up with my journal as I made this AMV might remember the point at which I discovered this effect, or rather, verified that it was available in After Effects and could do what I wanted it to do. That post involved a lot of exclamation points and capital letters.)
As mentioned previously during our lip sync discussion, the AE liquefy effect can bloat or pucker footage. It also can warp the footage in certain directions, very much like pushing finger-paint around. This has been a filter in Photoshop for awhile, and when I set out to make Sephiroth wink, I sort of had it in the back of my head that it was going to be a tedious, frame-by-frame Photoshop job to make his face “move.” Before I got to that point, though, the first thing I had to do was make his eye open and close. This was done frame by frame in Photoshop (Figs. 1-3), and these frames (eventually there would be eight) were brought in to replace the original footage in After Effects.
It was at this point that I realized that if Photoshop could liquefy something, OF COURSE After Effects could, and probably a whole lot better! Sure enough, there was the liquefy effect and sure enough, it worked exactly as well as I hoped. (It was at this point that I got the idea to experiment and see if the liquefy effect also could enhance some of my lip syncing.)
Because I wanted various points on Sephiroth’s face to move at different times and to different extremes, I created a few layers with different liquefy effects and used masks to reveal only certain areas of each layer (Fig. 4). On top of these layers I also added some shadowing, which was created in Photoshop after the initial liquefying was done and I could see where shadows needed to appear on Sephiroth’s face.
There were a couple of limitations which influenced my use of this effect. Number one, Advent Children faces are pretty stiff and smooth. The goal, therefore, was to make Sephiroth wink as realistically as he could be expected to, given his CG nature and my status as a non-Square-Enix animator. Number two, the wink had to occur when his hair wasn’t in the way. This left me a narrow window of opportunity, since Sephiroth’s hair isn’t supposed to move when he winks and there are only a handful of frames where his hair isn’t in the way of either his eye or his face (unless I wanted to get into rotoscoping his hair and then retouching his face, which I did not). This is the main reason the effect is so brief, though the dialogue in the trailer at this point also pushes it along very fast.
Q. So how'd you manage to create Tifa's fangs?
Tifa’s adorable little fangs, which I never thought of as adorable until people starting calling them that, were pretty easy to make and animate. It’s best if you think of them as dentures. There’s an upper set and a lower set, and they fit over Tifa’s original teeth to create the illusion of extended canines.
As to how the dentures were MADE, I lengthened and sharpened a few of Tifa’s original teeth with Photoshop’s Smudge tool until they were the proper shape. Since her mouth opens and closes in the AMV, this denture-creation work was done from a frame where her mouth is opened at its widest and the teeth are most fully visible (Fig. 1). These teeth were then isolated and put onto separate layers in Photoshop – one layer for the top set of dentures, one layer for the bottom (Fig. 2) – and these two layers were brought into After Effects. I then repositioned the two sets of teeth, frame by frame, so that they followed along with the teeth underneath as Tifa goes “rawr.” Masks were used in After Effects to first reveal, and then hide the teeth as her lips move over them (Fig. 3). So it’s not that complicated, really, just more compositing and masking at work!
Q: Ok, now I’m naturally curious about the sound wave in the back at :58 in your AMV. Why exactly did you choose to sync this with the voice acting, and why put it in the windows? More importantly though, how’d you manage to get that sound wave to work so perfectly with the pitch/speed of the voice?
Logic in AMVs has always been pretty important to me, so I often go way out of my way to support a certain concept or storyline in detail. Sometimes this logic actually gets in the way of what I’m trying to do, though, such that it confuses or distracts people (and me, when I can’t remember later on why I did what I did). The synced sound wave is one of those scenes where my logic perhaps went overboard. It made perfect sense to ME at the time, but…maybe not to others, particularly since you used the term “naturally curious.”
Let’s get the technical stuff out of the way first: the waveform is synced to Sephiroth’s voice with the AE Audio Waveform effect. You apply this effect to the layer comp you want to influence, then assign a specific audio layer as the source of the effect. It’s not hard to do, but it did take a while to get the waveforms styled just the way I wanted them once the effect was applied. These synced waveforms were placed behind Rude and President Shinra, Lens Blurred a bit, and then everything was rotoscoped (Fig. 1).
Now let me explain how we arrive “logically” at sound waves in the windows.
So in this AMV, the whole first “act” involves switching back and forth between scenes where Sephiroth and Cloud are conversing and scenes where Cloud is complaining about his situation to President Shinra and Rude. It all culminates with Cloud being convinced that he does want to join in their LARPing. There’s a lot of lip-synced dialogue in the first act, and leading into this sound wave scene, Sephiroth is really on a roll, but then, right in the middle of his speech about killer ‘shrooms, there’s a hiccup that has nothing to do with the lip sync (Sephiroth actually keeps talking here and could have finished out the scene with only a little help from me). This hiccup was caused by story and editing decisions I’d made up until this point, and goes back to what I said about crafting scenes first and worrying about the lip sync later: I’d put myself in a position of having to tie what Sephiroth was saying (“There be monsters in need of pummelin’.”) to what Cloud was responding to when he says “Ok, I’m in,” even though Cloud’s not actually in front of Sephiroth at that point – he’s in front of Shinra and Rude. This was all deliberate, but I’d created a problem I had to find a creative solution for. My original plan was to literally turn the windows into a computer screen, complete with Sephiroth on said screen, but it was very disorienting and did not look right at all when I actually tried it. This failed experiment took place long after the entire first act of the AMV had been pulled together, though, and by then it was way too late to go back and change everything just because the final few seconds weren’t working out as expected.
Well, I thought, who says Sephiroth’s not on the Verizon network? Obviously these folks have enough technology to use 4G, and I never showed Sephiroth actually talking face to face with Cloud at this point in the AMV. Maybe Sephiroth’s in the middle of a call to President Shinra, who asked him to lecture Cloud on speakerphone because Cloud’s being a whiny, stubborn brat, as usual! See how Sephiroth raises his eyes and doesn’t focus clearly as he talks in the scene just before this? It’s just like you do when you’re on the phone and someone can’t see you, but you kind of look into the sky as if you could see them over the airwaves! Those aren’t windows behind Shinra and Rude, anyways, those are giant computer screens. Yes, yes, this makes much more sense, you can’t see out of them so they are definitely LED screens hooked up to the teleconference system!
So yeah, that’s how you get sound waves in the windows -_- Obviously I didn’t do quite as good job with it as I should have. This sound wave caused me a lot of extra work, too, because these windows are shown twice before this point and I had to add – because it only made sense – the waveform (in a non-synced state) to those scenes as well, which of course meant rotoscoping both Shinra and Rude each time. I also “had” to add the shadow of the waveform to their backs in the scene where you can only see them from behind. -_- I’m not a perfectionist, I swear, I just prefer to make sure everything wraps up nice and neat, logic-wise. (And yes, I will experience a sinking feeling if someone points out a ball I wasn’t already aware that I dropped.)
Q. Can you share a little bit about any "hidden" effects in the video that normal users might have missed?
While there are some very obvious visual effects in this AMV, I also expended a lot of blood, sweat and tears on effects designed to go completely unnoticed. A lot of AMV editors use effects like these and unfortunately many times – even if people know the effects exist – they tend to go unremarked upon in comparison to other, flashier effects. Makes sense, but still – it can be harder to achieve a really good, invisible effect than one which is in-your-face obvious. If you aren’t perfect with your invisible effect, after all, it could be considered fundamentally flawed, but there is all kinds of room for error with obvious effects, and often those “errors” are more like differences of opinion in what the end result should be.
As far as L.F.S. goes, most of the “invisible” effects involved removing elements from the original footage which did not belong in my AMV. This wasn’t a cut-and-dry affair, though. In several instances, the original animators were zooming or panning or had other stuff going on, so I couldn’t just plop something down over the offending elements to cover them up, because associated elements were changing over time in lots of different ways which were difficult to mimic. A few examples of these “invisible” effects are included in the credit sequence for L.F.S. , but I’ll just go into detail about one that seems simple on the surface, but really was quite a headache.
There is a scene in my AMV where Yazoo is standing on top of a building, looking down over the square below where Reno and Rude are supposed to be. In the original footage, Reno is climbing/running up the face of that building, not standing in the square, so if I wanted to use that shot, he had to be eliminated from the building (Fig. 1).
Unfortunately, in addition to Reno being in the way in different ways, the camera is panning/zooming around the building in this scene, which has all kinds of details like pipes and ledges, plus windows with their own moving reflections, so it wasn’t feasible to just drop a “clean” building face on top of all that and have it come out looking right - there WAS no clean, universal building face. Nope, I had to go in with After Effects, use Time Remapping to isolate as much clean footage as possible, combine various shots with several levels of masking, then go in frame by frame and paint in new artwork as necessary using the Clone Stamp tool, all the while mimicking whatever camera action was going on (Fig. 2).
All of this for what? One second of footage in my AMV no one is ever going to notice, nevermind notice has an effect? Didn’t matter, I had to get Reno off that building. This is a PERFECT example of how I wound up spending 150 hours on relatively few effects in this AMV - even extremely short scenes with what seem like minor effects (or no effects!) quickly avalanched into time-sucking monsters.
In retrospect, there may have been an easier way to handle this scene with Reno, which goes back to what I said about not knowing very much about video effects and just doing things the best way I know how. It’s possible that enough “clean” surface of the building existed to allow me to carve it out and corner pin it over Reno, readjusting the perspective and alignment of the new face as necessary to keep up with the camera motion. I believe I still would have wound up retouching a fair amount of the footage by hand, though, and those window reflections wouldn’t have worked at all…so at the end of the day I possibly would have spent just as much time doing the effect this way as I did the other.
Truth be told, I’m kind of hoping perhaps some effects-type folks will read this interview and point out how my effects or techniques could be improved, or even just share alternatives to what was mentioned here. As I said before, there are often a lot of different ways to achieve the same results, and I certainly don’t want anyone thinking the way I approached these effects was the best or only way to go about it.
----------------
Past Interviews/Discussions
Check the Main Thread for all relevant information about future Lip Flappers, as well as past/future interviews!
____
Next Time on "The Lip Flapper"
Next week, we have a talk with a very unique person, known only as Radical_Yue!

